What is ISO and How to properly use that in your photography?
 Now that we have acquainted ourselves with the basic terminologies of photography, it’s time to step up our fixture. It cannot get any better without familiarizing yourself with ISO! This article is for those of you who are beginners in ISO and are probing ways to improve your photography skills.
A digital camera specification, ISO stands for International Standard Organization. It is nothing but a scale to assess the sensitivity of light.
To put it plainly, an ISO determines the extent of darkness or lightness in the images you take. The higher the ISO, the brighter your picture will be. Increasing this numeral can help you in capturing photos in dimly-lit backgrounds.
However, it’s not all agreeable. It has its loop sides. Escalating your ISO would be meted with consequences. A higher noise is one such upshot. This would mean greater grains on the images captured. Conclusively, you must resort to higher ISO settings only if you cannot attain that by regulating shutter speed or aperture as a proxy.
Common ISO values
Every camera is equipped with an intrinsic ISO range that you can choose from. The ISO value, (sometimes known by ‘ISO Speed’) although first defined film sensitivity, later branched out to be included in digital cameras to sustain related brightness level.
To identify with the concept of light regulation, let’s consider an example. If you were to increase your ISO from 200 to 400, your photos will be made twice as brighter.
Base ISO
The lowest assortment ISO on your camera is the base ISO. Estimated as a very chief setting, it provides you with a perspective to produce the maximal image quality with bare minimum noise. It must be noted that most modern DSLRs come with a base ISO of 100. You can very often make use of it to produce supreme quality images. The challenge only arises while shooting at a low-light condition.
A few aspects to consider while regarding ISO
- How the camera is held: You can either handhold your camera or place it on a tripod. To render your ISO low, you can make use of a tripod while using slower shutter speed.
- The action of the subject: For moving subjects, a high ISO must be used. On the other hand, for still subjects, using a lower ISO will suffice.
- Depth of field: If one is not shooting at a bigger depth of field, the aperture can be increased which allows more light to enter the camera.
- External light: If you are incorporating artificial light, more light is bound to enter your camera and you might just want to lessen the ISO.
- Noise: If you want increased grain, don’t shy away from notching up the ISO. The bigger, the noisier.
- Prospect of Zoom: If you are likely to zoom in your images, a lower ISO is favored.
Steps to adjust ISO
Although, the steps involved to change ISO are largely reliant on the specific camera that you use, here are a few steps to steer you through the process.
- To begin with, choose a mode that allows you to work and select the ISO yourself. Be sure to buzz off from the auto mode as it would hamper the course of action. Choose from Aperture Priority, Manual, Shutter priority or Program.
- For many base level DSLRs and mirrorless cameras, you most likely will want to open a quick menu and locate the segment dedicated for ISO
- For high-end cameras, there may be a proposed ISO button on the camera itself. One has to press it while turning the wheels to modify your setting. You can decide on the value you want, or simply position it to ‘Auto’. If you don’t make out a button marked for ISO, don’t fret. Chances are your camera will let you program one to execute this task.
- To make things more apparent, some cameras might even come with an assigned wheel that already has various ISO settings marked.
Don’t hesitate to glance through your camera manual if you are still unsure. Working with an ISO will never enfeeble, particularly if you shoot frequently in dimly-lit backgrounds without the use of a tripod or a flash.
What ISO should you apply?
Although many photographers identify with the fundamentals of ISO, they are in doubt while picking the ISO value. There is an explanation of why most cameras let their users shuttle between a multiplicity of ISOs- different circumstances call for different ISOs. Given below are a few instances which you might come across.
When to use a low ISO
 As we have come to understand, one must always resort to using a low ISO unless required. Sticking to the lowest achievable ISO on your camera will subsequently reduce the number of grains present in the photograph. When you are forced to use to shoot in low-light backdrops, you might still want to use a low ISO, if not the least feasible figure.
Mounting the camera on a tabletop or well again, a tripod, will make possible the capturing of images using long shutter speeds all the while with a low ISO. A shutter pace of five seconds would be ideal.
A low ISO is favored unless you want to shoot in extremely low-light backdrops
When to use a high ISO
Even though a negligible ISO is favored, there will come a legion of occasions where you will be enforced to utilize a high ISO. One such juncture is while dealing with motion blur. A sharper photo at a higher ISO will be preferred over a blurrier photo at a lower ISO.
In capturing images of fast-moving objects, there is always a risk of redundant motion blur. This would undoubtedly equal to a ruined picture. Conclusively, do not withdraw from the use of a high ISO when the situation demands-not enough light for the camera to capture sharp, vivid snaps.
If you are shooting handheld photos indoors; amidst a lowlight. While shooting ultra fast-action to ensure that no motion blur is introduced.
ISO timed for you
- When shooting at night, be quick to base the bar to an ISO 800. On doing so, make certain that your aperture is set low down and that, there is some source of scanty lighting.
- When shooting indoors with the use of an external flash, then launch around an ISO of 800.
- When capturing speedy moving subjects, let that ISO bar soaring.
- When you want to capture a blurred image (willingly), turn off Auto ISO and lessen your ISO to the lowest numeral. Make sure to raise your aperture, too.
- When you want to capture a subject but with a blurred background, front the highest aperture. This would smudge out what is at the rear of the focus.
Optimal maximization: Minimizing Noise and Maximizing Image Quality
Decisively, there is no rigid rule that one must only use only an exacting ISO. Practically, there is a wide array of ranges to choose from. But your choice must be guided solely by your requirements. To maximize your image quality, make note of the following few steps
- Denominating an aperture setting that offers the required depth of field
- Selecting a low or base ISO value and determining the required shutter speed to match and provide you with a proper exposure
- If the subject is progressively blurry, gradually raise the ISO and use rapid shutter speeds until motion blur wanes away.
- If you notice your ISO soaring whilst leaving out the opportunity to use a wider aperture, wait until ISO level reaches a more controllable level even at the cost of forgoing some of the desired depth of field.
Some botched claims
- ISO is sensor sensitivity: A maligned myth that is stretched all over web and print. ISO is more likely to be dubbed as a map- for, it tells the camera how the output photo should be, taking into consideration the input exposure.
- ISO bodily captures light: This could not be more bogus. No, an ISO doesn’t physically capture any light. It merely lightens the picture you already captured.
- ISO is a part of exposure: Another sham that ought to be brought to light. ISO is not part of exposure. It is the shutter speed and aperture that bodily captures light
One Last word
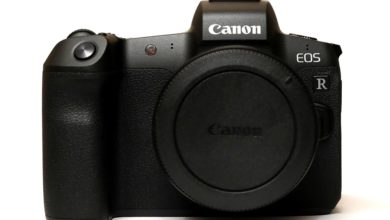
Not all the cameras have the same ISO capabilities and competence is very imperative. This is why professional photographers and videographers tend to renew their camera bodies every now and then. While some cameras can only offer ISO of minimal capabilities, there are high-end cameras that make possible a towering ability that unfolds right in front of your sight.
Don’t forget that between aperture, shutter speed, and ISO, there is a call for steady and stable balancing when it comes to capturing images. But it is not all complex and knotty that you cannot wrap your head around it. In fact, once you understand there features along with getting a hold of it, it will soon turn out to be a fun-filled and gratifying experience. We hope that this guide has brought you a step closer to your vision.